I can't believe I am preparing for my fourth year of teaching! Time flies! I am always thinking of ideas to improve my classroom. I can say my weakness when I first began teaching was classroom management. I designed these items to advance my classroom management and become organized before the school year begins. I have listed the links to my yearly behavior calendars, journal topics for student writing, and sight word worksheets and flashcards for extra practice. Visit my store and purchase any items you like. If you want something special created, let me know.
Superb School Supplies Steals
It's back-to-school shopping season! I LOVE the smell of fresh school supplies. I also love to shop, but that's old news. I shopped around with my school supply list to tell you the best and cheapest places to shop.
My First Grade Supply List
- Folder
- 12 pack of pencils
- 2 Erasers
- 4 Glue Sticks
- Scissors
- Markers
- 24 Crayons
- 4 Dry Erase Markers
- Index Cards
- Highlighters
I went to Target, Walmart, and Office Max to purchase these products. I also took into consideration convenience, availability, and style of products (cute notebooks, glitter school boxes, etc).
*Note- Some products are used in pictures more than once, I didn't buy the products if too expensive.
Target supplies added up to $16.84. I enjoy shopping at Target because of their unique designers, and creative displays.

Walmart was the cheapest. I knew it would be. Walmart supplies totaled $13.41. Walmart has large displays of supplies and very convenient to find what you're looking for.

I was surprised by how expensive Office Max actually was. I don't think they had any sales going on. I do have a teacher discount but did not use on this purchase. Office Max had many cute pencils, notebooks, teacher supplies, etc.

Happy school supply shopping everyone!! Don't forget a bookbag, lunchbox, baggies, hand sanitizer, and clothes!!
Labels:
back to school,
cheap,
dad,
elementary school,
family,
kids,
mom,
school supplies,
supply list,
teacher
Snagging A Sassy Teaching Job
Two million people graduated from college this year and everyone is trying to snag a perfect job. With having to work part time jobs, study, take exams, commute to school.. it's hard to prepare for a job search. This article is about landing a teaching position but can be used for any upcoming job interview.
A little background... I have a bachelor's degree in communication. I have always wanted to be a teacher, but when I was 17 and standing in line at college to register I went the business route. I thought teachers don't make any money and sit in a classroom with children all day. Man! If I would have done more research I could have saved a lot of money! I worked a desk job for 4 years and hated my life. I can't say it any nicer. I went back to school for my masters and completed a masters in early childhood education.
Here comes the struggle... I interviewed for maybe 50 teaching positions. I wish I had a video of what I actually said on those interviews because I'm sure it was comical. It took me 3 years to find the perfect teaching position. Here are some tips I've learned along the way to speed up the process.
1. Be persistent
- Check online sources everyday. Check your state education websites and hiring websites. I used Effronandassociates.com too.
- Set a goal for yourself: "Today I will apply for 10 jobs". Save your data in a word document so you can copy and paste. This will save time.
- Teaching job interviews are more common in March-April and July-August. This is when teachers plan or decide on retiring.
- Make a colorful cover. Put your picture on the front, they'll remember you.
- Add a general cover letter: "To Human Resource Department"
- Add your resume
- Then a list of respectful resources
- A copy of your teaching license
- A sample of lesson plans
- Any copies of your strengths (letters from cooperating teacher, student data scores, student achievement, your RTI plan, sample newsletters, etc.)
- Color copy, Add a leather back and frosted clear cover, and black spiraling. Print off 20-50 to start.
- Send these out everyday in the mail. I would send them to HR offices, principals, teachers I knew. I would even visit schools and drop them off. When there is a stack of 1,000 resumes... Your portfolio will stand out and they will pull it to give you an interview.
- Black, navy, or gray suit- pants or skirt.
- Try to wear the school colors in a blouse, tie, or jewelry.
- Light jewelry and light makeup- but try to do both! This will make you look lively and glamorous
- Wear short heels. Not flats, not 6 inch. Fight through the pain
- Wear your suit jacket in, but feel free to take it off during the interview if you get warm.
- Get your nails done! Wear a light pink or nude lip gloss and pop in a mint. Where do you think they'll be looking?? At your mouth and hands.
- Smile- They are hiring a teacher!
4. Practice, Practice, Practice...
- Have a leather portfolio with a master copy of your portfolio. Also those printable portfolios.. Have 10 prepared for all attending the interview. Most of the time they will give them back but be sure everyone has something to look at. The worst is when multiple teachers are interviewing you and have no resume to look at to ask you questions.
- Walk in, introduce yourself, shake hands, and look people in the eyes. Pass out those portfolios and remember everyone's name. When I get called for an interview I ask who will be sitting in the interview and I have the Thank You's made prior to the interview. I will mail them after.
- Practice with a friend.. your friends are more nerve wrecking than people you don't know.
- Describe yourself. "My name is Alyson Schweinfest. I have a bachelor's degree in communication and a masters degree in education. My background in communication has progressed me to become a strong educator by working with children, teaching literacy components, and discussing data with parents. I am creative and enjoy incorporating creativity into my lessons. In my spare time I love to read. The last book I read was.. " Have notes on your lap to help you if you get stuck. Also have notes on points you want to get across. There is nothing against this.
- What are your strengths? What are your weaknesses?
Pick a great strength, pick a pointless weakness. "My weakness is trying to incorporate music into my lessons." SEE! You're not the music teacher so that's not a bad weakness. - What's your classroom management plan? What's your RTI plan? You should have these in mind already. If you don't.. you might be a refresher course.
- What learning styles will you address? Verbal, Whole group, hands-on (tactile-kinesthetic), technology, poems, songs, dance, cooperative learning
- Why should we pick you? You need a really good reason because you need to stand out above the pack.
I hope these tips help. Comment if you need any help. I'd be happy to help because I know the job search is hard. Happy interviewing and Good Luck!
Highlighting and Contouring in 10 Easy Steps
Here are my 10 steps for any and every girl to highlight and contour.
First- What is it? Highlighting and Contouring are using lighter and darker products to define parts of your face. This is the well known Kardashian makeup trick and #nofilter for your instagrammy pics.
Common Mistakes- Highlighting is meant to bring out areas you want to "highlight" or show off. Contour your areas you want to hide, or make smaller.
MAKEUP IS SCIENCE AND ART!! Find your skin tones and find a contrast. I have yellow skin tones. If you look at a color wheel, the opposite of yellow is purple/red.. So I use a bronzer with red tones and a highlighter with pink tones.
Also glue goes on paper, paper on glue.. Things we teach first graders...
If you put a creamy product on your face, cover it with powder and vice versa
If you apply glue on top of glue.. it will slide off.. right? So think creamy, powder, creamy, powder to set your products.
Step 1- Use a primer! I actually used a drug store product for this.. Neutrogena Healthy Skin Primer. This is very light and has sunscreen!
Step 2- Put on a thin layer of foundation. I use the Beauty Blender to evenly press foundation. I used MAC Studio Fix Foundation.
Step 3- Concealer! I love highlighting. This is where I like to highlight for photos and lighting. You can choose where you want to highlight on your own face, and how much. I use MAC Studio Finish Concealer in a pinkish/white shade to have contrast. Even if I don't highlight and contour all the way, I do the concealer part almost everyday. Especially being a teacher, I always have dark circles I need to cover up. This does the trick.
Step 4- Set your concealer. I use Ben Nye powders or a mineral powder depending on how oily my face is. I use almost a white to pinkish white shade depending on my skin tone. Use a small brush and PAT the powder over top the concealer. Try not to rub to avoid pulling skin over time.
Step 5- Bronzer or Contouring. I do not like my large forehead or wide face (Sorry I'm a typical female) So I contour my cheek bones and forehead. I use small strokes to put a deep line of bronzer in the dent underneath the cheek bones. I use small strokes around my hair line and on my temple, I also do under my chin. I make a "3" on the sides of my face.
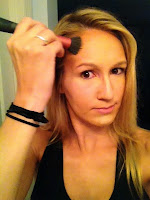
Step 6- Highlighting AGAIN!! Don't judge me for over highlighting, I can't help it. I put this step in here to show pictures but this could be a step 8. I use Benefit High Beam (light pink) to highlight on top of contouring, nose, temples, v above top lip, and chin. This adds shine and shimmer.
(I am also setting the highlighter with a powder highlighter too)
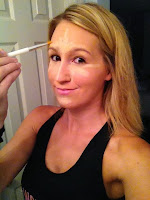
Step 7- (optional) Contour that nose! I dislike my nose. So a draw a small outline around the nose in bronzer to make my nose look smaller in pictures. This tip is keeping plastic surgeons out of business. (In picture above)
Step 8- Blend! I am using a small wide brush to blend. Blend in circles. You should not be able to see any lines. Blend everything together.
Step 9- Reapply any products if needed. Don't forget to highlight around your brows too. Don't forget blush on your cheeks! Set with powder overall. Spray a finishing spray all over face.
Step 10- Take an instgram picture and show your makeup off!!


