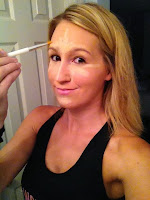
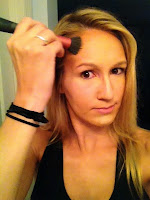
Here are my 10 steps for any and every girl to highlight and contour.
First- What is it? Highlighting and Contouring are using lighter and darker products to define parts of your face. This is the well known Kardashian makeup trick and #nofilter for your instagrammy pics.
Common Mistakes- Highlighting is meant to bring out areas you want to "highlight" or show off. Contour your areas you want to hide, or make smaller.
MAKEUP IS SCIENCE AND ART!! Find your skin tones and find a contrast. I have yellow skin tones. If you look at a color wheel, the opposite of yellow is purple/red.. So I use a bronzer with red tones and a highlighter with pink tones.
Also glue goes on paper, paper on glue.. Things we teach first graders...
If you put a creamy product on your face, cover it with powder and vice versa
If you apply glue on top of glue.. it will slide off.. right? So think creamy, powder, creamy, powder to set your products.
Step 1- Use a primer! I actually used a drug store product for this.. Neutrogena Healthy Skin Primer. This is very light and has sunscreen!
Step 2- Put on a thin layer of foundation. I use the Beauty Blender to evenly press foundation. I used MAC Studio Fix Foundation.
Step 3- Concealer! I love highlighting. This is where I like to highlight for photos and lighting. You can choose where you want to highlight on your own face, and how much. I use MAC Studio Finish Concealer in a pinkish/white shade to have contrast. Even if I don't highlight and contour all the way, I do the concealer part almost everyday. Especially being a teacher, I always have dark circles I need to cover up. This does the trick.
Step 4- Set your concealer. I use Ben Nye powders or a mineral powder depending on how oily my face is. I use almost a white to pinkish white shade depending on my skin tone. Use a small brush and PAT the powder over top the concealer. Try not to rub to avoid pulling skin over time.
Step 5- Bronzer or Contouring. I do not like my large forehead or wide face (Sorry I'm a typical female) So I contour my cheek bones and forehead. I use small strokes to put a deep line of bronzer in the dent underneath the cheek bones. I use small strokes around my hair line and on my temple, I also do under my chin. I make a "3" on the sides of my face.
Step 6- Highlighting AGAIN!! Don't judge me for over highlighting, I can't help it. I put this step in here to show pictures but this could be a step 8. I use Benefit High Beam (light pink) to highlight on top of contouring, nose, temples, v above top lip, and chin. This adds shine and shimmer.
(I am also setting the highlighter with a powder highlighter too)
Step 7- (optional) Contour that nose! I dislike my nose. So a draw a small outline around the nose in bronzer to make my nose look smaller in pictures. This tip is keeping plastic surgeons out of business. (In picture above)
Step 8- Blend! I am using a small wide brush to blend. Blend in circles. You should not be able to see any lines. Blend everything together.
Step 9- Reapply any products if needed. Don't forget to highlight around your brows too. Don't forget blush on your cheeks! Set with powder overall. Spray a finishing spray all over face.
Step 10- Take an instgram picture and show your makeup off!!


No comments:
Post a Comment